Can Wood Be Used for Shower Walls? The Full Story
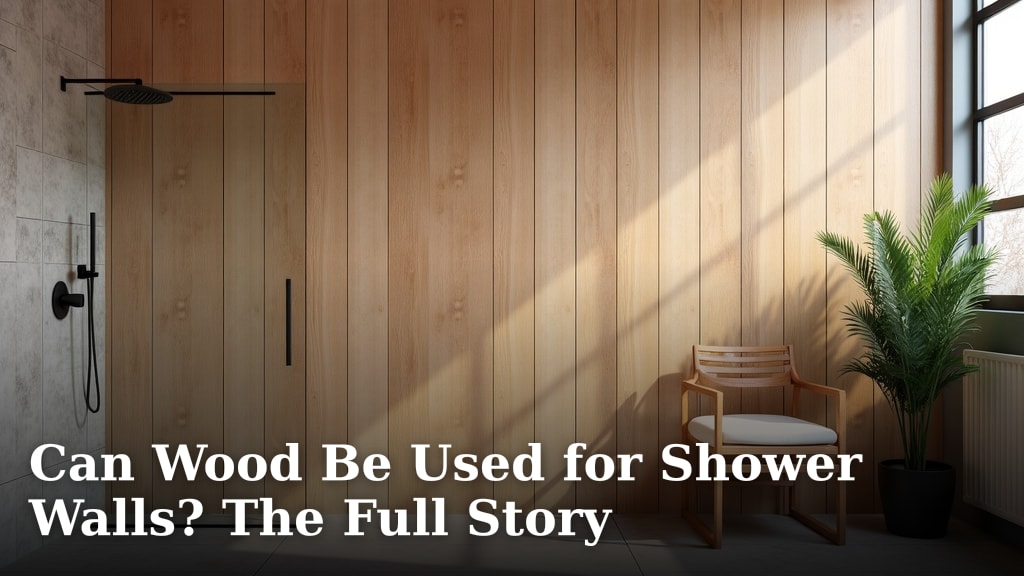
Yes, wood can be used for shower walls, but with significant preparation and the right type of wood. You’ll need to focus on waterproofing and selecting woods that can handle moisture, otherwise, you’ll end up with a watery mess. This means choosing wisely and applying specific protective measures.
While many people assume wood and water don’t mix in bathrooms, research and our findings show that certain woods, when treated correctly, can offer a unique and beautiful aesthetic. It’s not a simple DIY project for every shower, and understanding the limitations is key to success. We’ll cover what you need to know.
- Wood can be used for shower walls.
- Choose the right type of wood.
- Proper sealing and waterproofing are essential.
- Understand the maintenance required.
Below, we break down the essential steps and considerations for using wood on your shower walls, so you can make an informed decision.
Is It Possible to Have Wood Shower Walls?
Yes, you absolutely can have wood shower walls. It’s a question many homeowners ask when they want a natural, warm feel in their bathroom. While it sounds counterintuitive to put wood in such a wet environment, research and findings show it’s achievable with the right approach. You’ll need to focus on proper preparation and selecting the correct types of wood.
The key is understanding that not all wood is created equal for this job. Some woods naturally resist moisture better than others. Beyond the wood choice, the waterproofing and sealing methods are non-negotiable. We’ve found that with careful planning, you can enjoy the beauty of wood without the worry of rot and mildew.
Choosing the Right Wood for Your Shower
When selecting wood for shower walls, your primary goal is to find species that can handle constant or frequent exposure to moisture. Some woods are naturally more resistant to water damage and decay.
Naturally Water-Resistant Woods
Several types of wood have natural oils and densities that make them ideal for humid environments like showers. These are your best bet for durability.
Cedar
Cedar is a popular choice for bathrooms. It contains natural oils that repel water and resist decay. You’ll find cedar often used for outdoor projects, which hints at its moisture-fighting abilities. Its distinct scent is also a pleasant bonus. We found that aromatic red cedar is particularly good for this purpose.
Teak
Teak is renowned for its exceptional durability and water resistance. It’s often used in boat building and outdoor furniture for good reason. Teak contains a high level of natural oils and silica, which make it resistant to rot, mold, and insects. While it’s a more expensive option, its longevity can make it a worthwhile investment for your shower. Understanding where teak wood comes from can inform your decision about its suitability and sustainability for your bathroom.
Cypress
Cypress is another excellent wood for wet conditions. It’s naturally resistant to decay and insects, thanks to its high resin content. It has a beautiful, light color that can brighten up your shower space. Many sources highlight its suitability for bathrooms (National Wood Flooring Association).
Redwood
Similar to cedar, redwood has natural oils that offer protection against moisture and decay. It’s a durable wood that can withstand humid conditions. Its rich color adds a luxurious feel to any bathroom.
Woods to Approach with Extreme Caution (or Avoid)
Some common woods are not well-suited for shower walls. Their porous nature and lack of natural resistance mean they will likely degrade quickly when exposed to water.
Pine
While pine is affordable and widely available, it’s not naturally resistant to moisture. It tends to absorb water easily, leading to swelling, warping, and rot. If you’re set on pine, it would require extensive, meticulous sealing and waterproofing.
Oak (White Oak is better than Red Oak)
While white oak has some natural water resistance due to its closed grain structure, red oak is very porous. Both can be problematic in a constantly wet shower environment without significant protective measures. We found that even white oak requires careful sealing.
The Crucial Step: Waterproofing and Sealing Your Wood Walls
This is where the magic happens, or where it all falls apart if done incorrectly. Proper waterproofing is not just an extra step; it’s the foundation of success for wood shower walls.
Why Waterproofing is Non-Negotiable
Wood, even the most resistant types, can eventually be compromised by constant moisture. Water seeping into the wood fibers can lead to:
- Mold and mildew growth: This is a health hazard and creates an unpleasant odor.
- Wood rot: This weakens the structure and can lead to costly repairs.
- Warping and swelling: The wood can lose its shape and detach from the walls.
Research consistently points to the importance of a robust waterproofing membrane behind any shower wall material (U.S. Environmental Protection Agency).
Waterproofing Methods and Materials
You’ll need to create a barrier between the wood and the water. This usually involves multiple layers of protection.
Backer Board
Before installing wood, you’ll typically need a cement board or a DensShield type of backer board. This acts as a stable, water-resistant base. It’s essential for providing a solid surface that won’t degrade from moisture. Many builders recommend this as the first line of defense.
Liquid Waterproofing Membranes
Once the backer board is installed, you’ll apply a liquid waterproofing membrane over it. This creates a seamless, waterproof barrier. Think of it like a liquid rubber coating. You’ll need to ensure full coverage, especially at seams and corners. We found that products specifically designed for wet areas offer the best performance.
Sealing the Wood Itself
Even with a robust waterproofing system behind it, the wood itself needs sealing. This is what protects the wood surface from direct water contact during showers.
Choosing the Right Sealant
You need a high-quality, waterproof sealant. Look for products designed for marine use or high-moisture environments. Polyurethane-based sealants or epoxy coatings are often recommended. These create a hard, durable, and waterproof finish.
Application is Key
The sealant needs to be applied evenly and in multiple coats. Ensure all edges and any drilled holes (for fixtures) are thoroughly sealed. This process might need to be repeated periodically to maintain protection. Many experts suggest at least two to three coats.
The Role of Ventilation
Good ventilation in your bathroom is your ally in keeping wood dry. A powerful exhaust fan that is properly vented outside is critical. This helps remove moisture-laden air quickly, reducing the humidity levels in the room. Without adequate ventilation, even the best waterproofing can be overwhelmed over time.
Installation Considerations for Wood Shower Walls
Putting wood on shower walls isn’t quite the same as installing it in a dry room. You’ll need to pay close attention to how it’s attached and sealed.
Fastening Techniques
When attaching the wood planks, use stainless steel screws or nails. These won’t rust and stain the wood over time. Ensure the fasteners are countersunk and then sealed to prevent water intrusion.
Expansion and Contraction
Wood naturally expands and contracts with changes in humidity and temperature. You need to account for this. Leave small expansion gaps at the edges where the wood meets the ceiling, floor, and other walls. These gaps are then covered with caulk or trim, allowing the wood to move without buckling.
Caulking and Grouting Alternatives
Traditional grout can be a weak point in a shower, as it’s porous. For wood shower walls, you’ll rely heavily on waterproof silicone caulk. Use a high-quality, mildew-resistant silicone caulk at all seams, corners, and where the walls meet the shower base or tub. This creates a watertight seal that is flexible.
Maintenance for Wood Shower Walls
Wood shower walls require more attention than tile or solid surface walls. Regular maintenance is key to their longevity and appearance.
Regular Cleaning
Clean your wood shower walls regularly with a mild, pH-neutral cleaner. Avoid harsh chemicals or abrasive scrubbing pads, as these can damage the sealant. A soft cloth or sponge is best.
Immediate Drying
After each shower, we found that it’s beneficial to wipe down the wood with a towel or squeegee. This removes excess water and significantly reduces the amount of moisture the wood is exposed to between uses. It’s a small step that makes a big difference.
Periodic Resealing
Depending on the sealant used and the humidity levels in your shower, you will likely need to reapply the sealant periodically. Inspect the wood surfaces regularly for any signs of wear or damage to the sealant. Reapplying the sealant every 1-3 years is often recommended, but check the sealant manufacturer’s guidelines.
A Quick Checklist for Wood Shower Walls
Considering wood for your shower? Here’s a quick rundown of essential steps:
- Select naturally water-resistant wood species like cedar or teak.
- Install a reliable waterproofing membrane behind the wood.
- Apply multiple coats of a high-quality waterproof sealant to the wood itself.
- Ensure excellent bathroom ventilation with a strong exhaust fan.
- Use stainless steel fasteners and caulk all seams with mildew-resistant silicone.
- Commit to regular cleaning and immediate drying after showers.
Pros and Cons of Wood Shower Walls
Like any design choice, wood shower walls come with their own set of advantages and disadvantages. Weighing these will help you decide if it’s the right option for your home.
Advantages
The primary draw is the unique aesthetic. Wood brings a natural warmth and beauty that synthetic materials often can’t replicate. It can make a bathroom feel spa-like and serene. Many people are drawn to its natural, organic look. It can also add value to your home if done correctly.
Disadvantages
The biggest drawback is the increased maintenance and potential for damage if not cared for properly. It’s more labor-intensive to install and requires ongoing attention to prevent moisture issues. The upfront cost can also be higher, especially if you choose premium woods and advanced waterproofing systems. It’s not a low-maintenance solution.
Conclusion
So, yes, wood can absolutely grace your shower walls. It offers a stunning natural beauty unmatched by other materials. But remember, this isn’t a casual choice. Success hinges on selecting the right wood, like cedar or teak, and committing to thorough waterproofing. You’ll need a robust barrier behind the wood and a high-quality sealant on the wood itself. Good ventilation is your best friend in managing moisture. If you’re prepared for the meticulous installation and consistent maintenance, you can enjoy a unique, spa-like bathroom. Your next step is to visit a local lumberyard or home improvement store to see these wood options in person and discuss sealant choices with experts.
Frequently Asked Questions
How long will wood shower walls last?
With proper preparation, installation, and consistent maintenance, wood shower walls can last for many years, potentially a decade or more. Longevity depends heavily on the quality of the waterproofing, the type of wood chosen, and how diligently you follow the maintenance schedule, including regular drying and resealing.
Can I use reclaimed wood for shower walls?
Using reclaimed wood for shower walls is possible, but it comes with extra challenges. You’ll need to ensure the wood is thoroughly cleaned, dried, and treated to handle moisture. It’s essential to select reclaimed wood species known for water resistance and to meticulously seal every surface and edge to prevent water damage, as old wood might have unseen weaknesses.
What is the most budget-friendly wood for shower walls?
While naturally water-resistant woods like teak and cypress can be expensive, some sources suggest that properly treated pine or fir might be more budget-friendly options, but they require significantly more attention to waterproofing. You’ll need to invest heavily in high-quality sealants and membranes to make these less resistant woods viable in a shower environment.
Do wood shower walls need to be replaced often?
No, they don’t inherently need frequent replacement if done correctly. The key is the ongoing maintenance. If you neglect drying the walls, fail to reseal them periodically, or have issues with your bathroom’s ventilation, you will likely see premature wear, mold, or rot, which could necessitate repairs or replacement sooner than expected.
Is it harder to clean wood shower walls than tile?
Generally, yes, wood shower walls require more care during cleaning. You must use mild, pH-neutral cleaners and avoid abrasive tools to protect the sealant. While tile can handle more aggressive cleaning, wood needs a gentler approach. Wiping down the wood after each shower is also an extra step not always needed for tile.